
Article updated on 12.05.23
For some years now, Chile has had a law requiring anyone using a Chilean telephone number to register their phone nationally online. If this is not done within the first 30 days, the phone will automatically be blocked and therefore cannot be used in Chile.
In this article, we explain the steps involved in registering your phone in Chile. It’s free and easy, so don’t be fooled into paying someone to register your phone.
Buying a SIM card in Chile
First of all, you need to go to a mobile phone shop to buy a prepay SIM card (prepago in Spanish). We advise you to go to Entel, where you can buy an offer with 60GB of internet for 30 days for around 10 euros. You can renew this offer every month via the application.
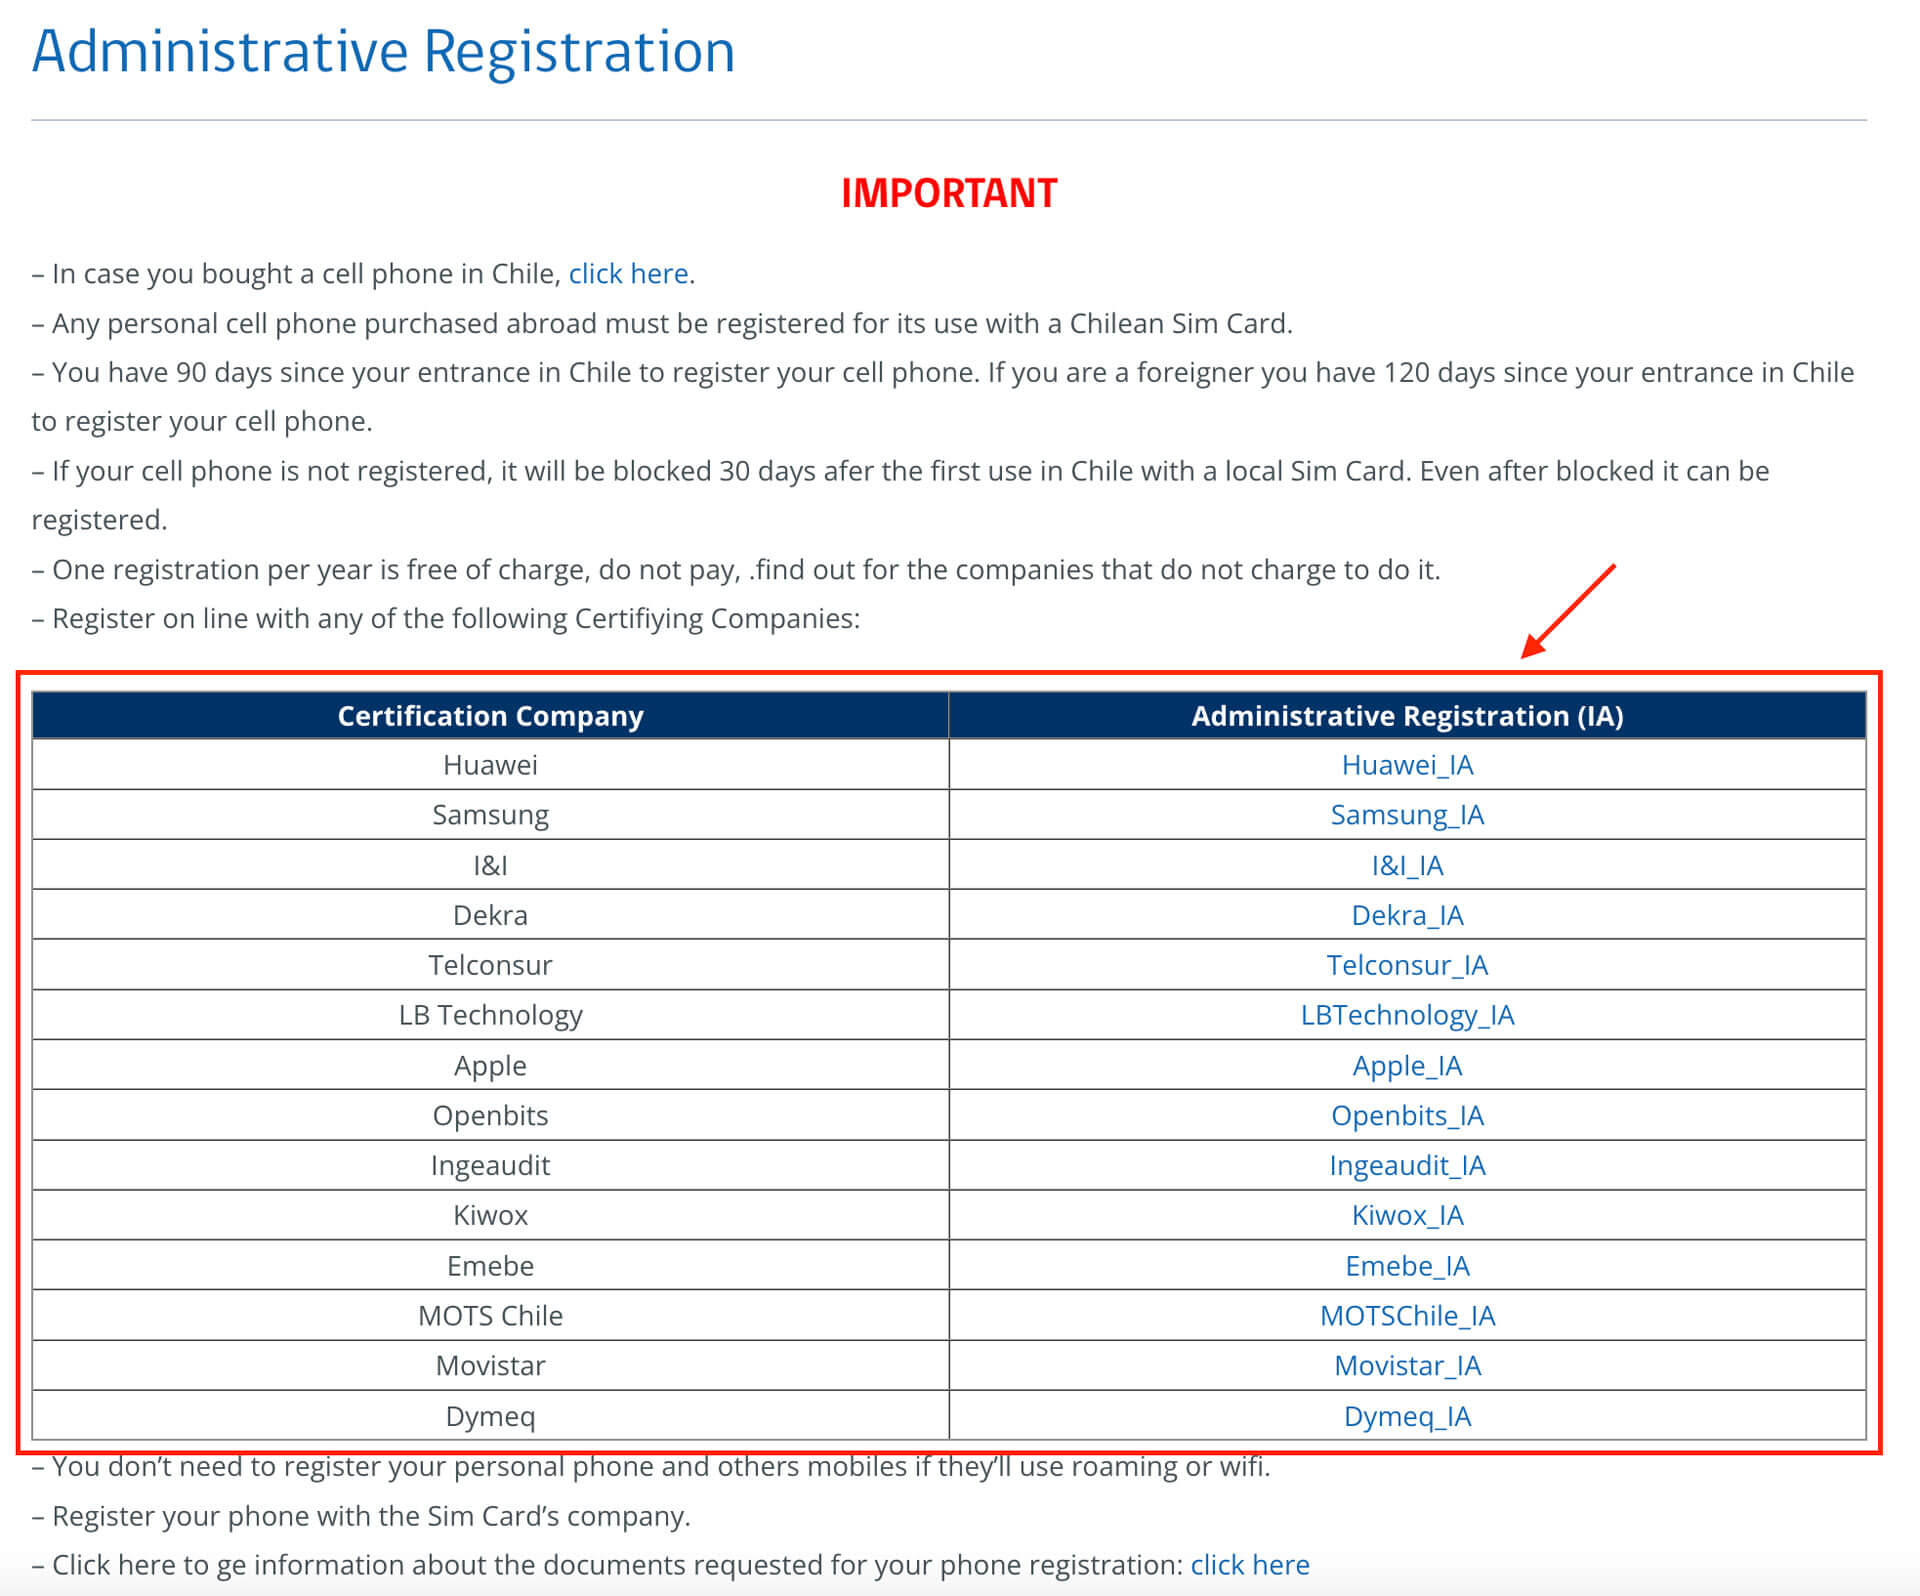
Registering your mobile phone in Chile
Visit the website: https://multibanda.cl/ar/
Choose the brand of your phone (Apple, Huawei, etc). Then click on the link for the form linked to your phone brand.
Fill out the form
You need to fill out the form with your personal details. Here is the definition of each field:
« Paso 1 » Part 1 :
- « Nombre y apellido » = First name and Last name (as shown on your passport)
- « N° Documento Identificación » = Passport number
- « N° de teléfono de contacto » = New Chilean telephone number
- « Email contacto » = Email address (it is important to enter one that you have access to in order to receive confirmation of registration)
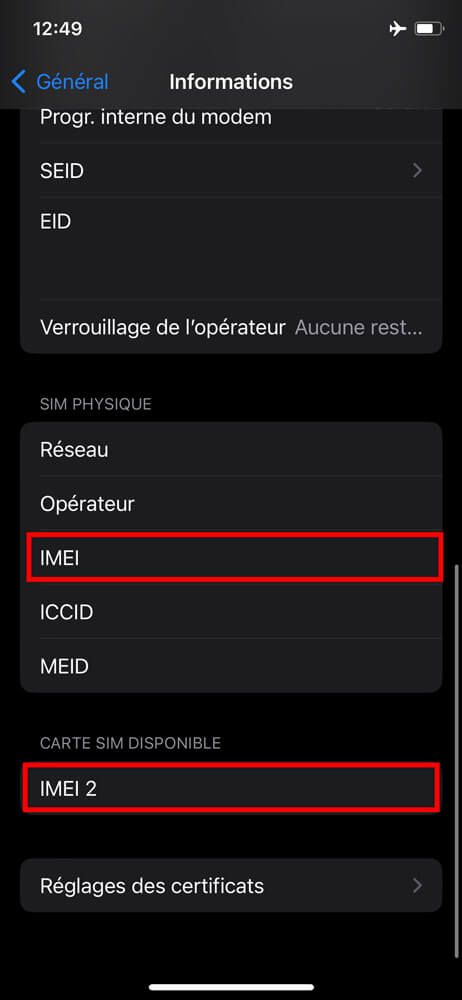
- « IMEI 1 » = IMEI 1 is a number found in your phone’s settings. For an iPhone, this number can be found in “Settings -> General -> Information -> IMEI”.
- « IMEI 2 » = IMEI 2 is a number found in your phone’s settings. For an iPhone, this number can be found in “Settings -> General -> Information -> IMEI”.
- « Marca » = Brand of your phone (Apple, Huawei, etc.)
- « Modelo » = Model of your phone (iPhone X, iPhone 11, iPhone 11 Pro, etc.)
- « Tipo de registro » = Type of registration. Choose “Registro para extranjero” (registration for foreigners)

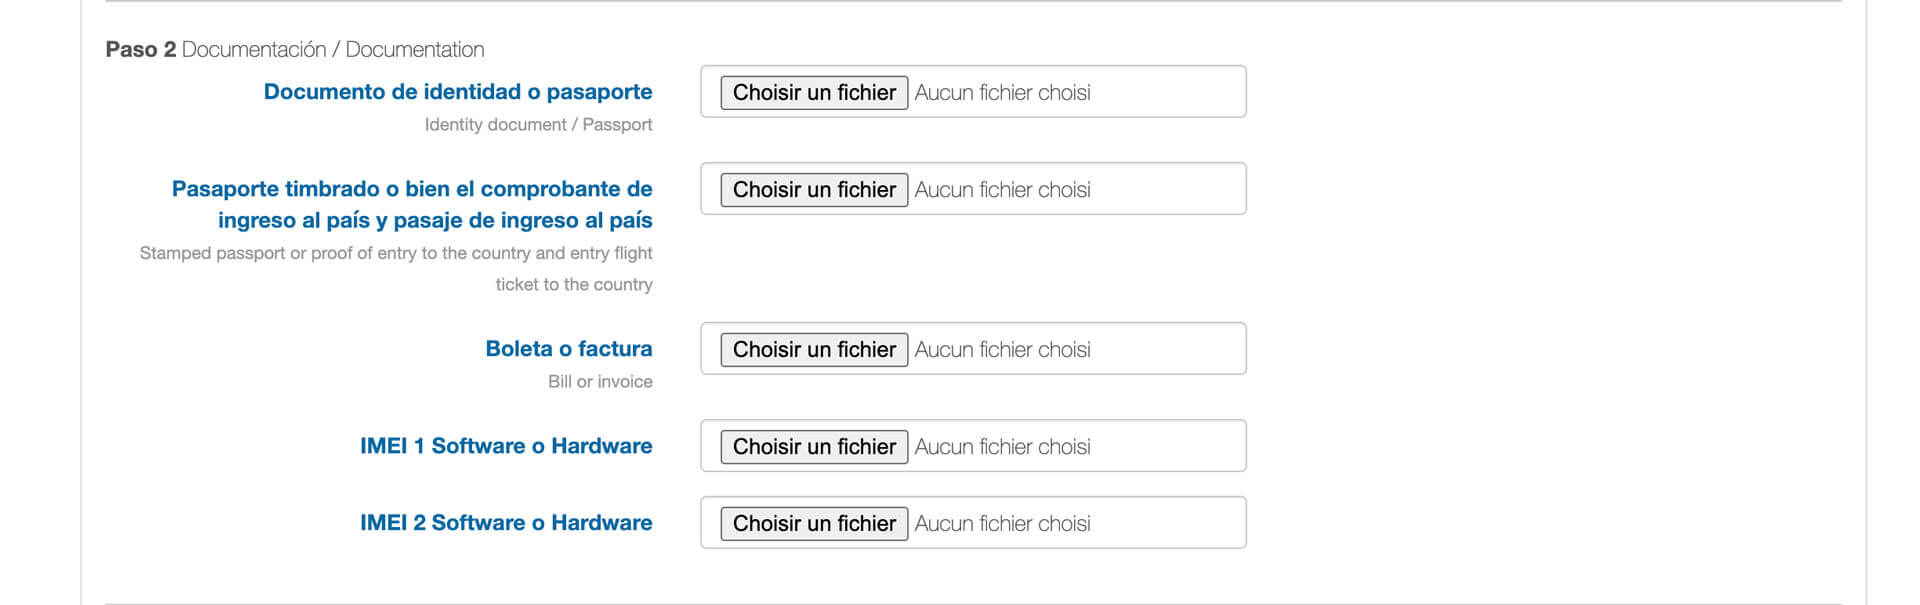
« Paso 2 » Part 2 :
- « Documento de identidad o pasaporte » = Import a picture of your passport
- « Pasaporte timbrado o bien el comprobante de ingreso al pais y pasaje de ingreso al pais » = IImport a picture of the PDI received when crossing the border into Chile
- « IMEI 1 Software o Hardware » = Import a screenshot of IMEI 1 (see picture of IMEI above).
- « IMEl 2 sottware o Hardware » = Import a screenshot of IMEI 2 (see picture of IMEI above).
« Paso 3 » Part 3 :
- « He leído y acepto los términos y condiciones » = Accept the terms and conditions by ticking the box
- « Solicitar inscripcion » = Send the form by clicking on the button

Waiting for confirmation of phone registration
You will receive confirmation that the form has been sent by email. From now on, you’ll need to wait 3-5 working days to receive confirmation that your phone has been registered. Once you’ve received it, there’s nothing more to do.
We repeat, it’s really important to fill in this form if you don’t want your phone to stop working in Chile after 30 days.
And don’t forget that it’s free!
Did you like the article?
Pin it !


Leave a Reply